Blogging

How on earth did you create your blog? Part 3

In parts 1 and 2 of this article, we covered how to get a blog established and how to tweek it once you’ve installed it to represent your style. Here, we’re going to speak more to the posts themselves, and some other, miscellaneous items. This is it gang, for the ‘how did you create your blog’ series. We’ll go back to more ‘normal’ discussions after this.

Once I got my blog set in terms of the look and feel, and the functionality that I wanted (BTW, I was aiming for ‘bright and happy’ on the look, and ‘clean and simple’ for the functionality), I was ready to begin publishing! Remember, you are ‘publishing’. When you post to a blog (either as the original author or adding a comment), you are ‘publishing’ to the world…and its a much bigger world than is ever going to pick up a book…you never know when someone will read it. So, put your best foot forward, and don’t say anything you’d mind your mother reading :-).

Creating a post is very, very simple. Simply enter a title, add some text, and click ‘publish’. That said, there are a few things you want to think about when writing:

1. Your Title counts where Google and SEO (Search Engine Optimization) is concerned! Make it meaningful and pertinent to the discussion. The title weighs heavily in Google rankings.

2. You can add ‘Categories’ to your post which will group them in the navigation of your site. They are also used for Google/SEO rankings, but categorize by what makes sense, so users can find the information they are looking for easily. On this blog, the categories are:

SLC Blog Categories

You determine the Categories that each post belongs to. You can add as you go along – you don’t need to know all of them up front. Right now, these are the ones that we are using, but we may add more as we go along. The ‘Blog’ category wasn’t there initially, but made sense after we started these articles.

3. Before you publish, you can add ‘tags’ to the posts. “Tags” are more specific than broad categories, however, they are picked up by Google/SEO for search engine rankings. For instance, while this post is in the category ‘Blogging’, the tags will be ‘SEO’, ‘blogging’, ‘social media’, ‘blog categories’ and ‘blog tags’. The tags are much more specific than the categories.

For WordPress, there is a great FAQ on Categories vs. Tags here.

My last step, after I had gathered a bunch of posts and published them on the blog (I re-purposed content that I had previously used on my LinkedIn Group – there’s nothing wrong with doing that) was to send out a blast e-mail to most everyone in my list of Contacts. That may well be how you got here. Tell your contacts what you’re up to, what your blog is about, and why they might want to subscribe or check it out. Then, let them come!!

One note (and this may be the most important one)…you may have heard that content on Blogs is picked up by Google very quickly. I’m here to tell you that they (whomever ‘they’ are) weren’t kidding!!!! I posted my first blog article on October 29th, 2010 at 8:15pm. I had a Google Alert on ‘SLC Consulting’, with a link to my first blog article, in my Inbox on October 31st, 2010 at 4:52pm. I wish that my original site had been picked up that quickly (that took months…not less than 48 hours). That time was totally organic – I did nothing to try to ‘push’ the indexing through. I didn’t have tags yet. I didn’t post a link elsewhere. Basically, that first post was just sitting there, looking sexy :-)…and Google found it. For those people looking to drive traffic to their sites (that’s not my primary goal, but I know that it is foremost for some people), that is a compelling reason for starting a blog.
How on earth did you create your blog? Part 2

Now that you’re hooked, and you’ve made the commitment to writing a blog, you need to install your platform. Again, for purposes here, I’m discussing only WordPress (because its what this blog is using), but there are all kinds of others out there. Google’s blog creator is ‘Blogger’ which you can find at www.blogger.com. Google ‘free blog services’ and you’ll get myriad of alternatives.

So, back to what I encountered as I established this blog…

As we discussed in Part 1, I installed WordPress on my website, so that I host the blog, rather than WordPress hosting the blog (both alternatives are available). Next, I selected and installed a theme that expressed my ‘personality’ or the ‘personality’ of the blog.

Here was the first lesson: When doing most anything on WordPress, first you ‘install’ it, then you ‘activate’ it, then you ‘configure’ it. ‘Installing’ it downloads the appropriate files to your site. ‘Activating’ it actually makes the item operational on your site. ‘Configuring’ something means putting in your variables (e.g. the URL for your blog, or your Twitter address, etc.)

Next, I created a post – and commented on my own post. It was something innocuous that I could use to see what the site would look like when it was up and running. I actually tried installing and activating several themes before I decided that I liked this look and feel. One neat thing about a blog (unlike a LinkedIn discussion) is that you can edit or delete a discussion any time you want. So, you can put test ‘stuff’ out there, and see what it feels like and looks like to the community at large. If you change your mind later, just delete the post, or alter the blog configuration.

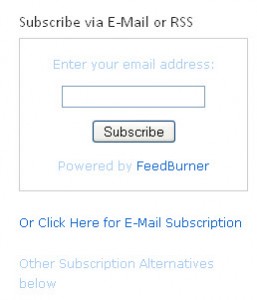
Because I want people to be able to subscribe to this blog, I went to the ‘plugins’ area and searched for a couple of plugins which would allow people to subscribe to the blog in various ways. I ended up using ‘Feedburner Feedsmith’ plugin to control the e-mail subscriptions. I was surprised, but not displeased, when I found that this was a Google product (my Google signon got me into the Feedburner site). Once the plugin was installed and activated, I sort of ‘lost’ it. That’s one tip to pass along: Once you install and activate a plugin, it will show up SOMEWHERE else in your tools for actual configuration and maintenance. In this case, the Feedburner plug-in appeared in my ‘widgets’ section. From there, I could configure it to suit my needs. The Feedburner plugin on my site controls the e-mail subscription area. I can see exactly WHO has subscribed to the e-mail subscription for the blog, how often those subscribers have visited, etc.

This is the portion of this Blog that is controlled by Feedburner:

Feedburner appearance on live site

Feedburner Installed on this blog

I also wanted to allow people to subscribe via and RSS feed, Twitter or use a graphic to subscribe to the e-mail service. There were lots of alternatives (and I certainly did NOT try them all – I tried them until I found one that worked for me), and I settled upon ‘Subscription Options’ by Tom Saunter. Again, I downloaded and activated it, then had to hunt around until I ‘found’ where it had been stashed in my control panel. Voila! I found it under ‘Widgets’ again (just like Feedburner). I dragged the widget to the location I wanted it, put in several configuration pieces of information and I was done. Pretty darned easy, once I got the hang of A) looking for the Plug-In elsewhere once installed and activated, and B) figuring out that there is minor configuration once you activate it. This is the portion of the blog that is controlled by the ‘Subscription Options’ plugin:

Subscription Options

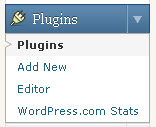
Lastly, I installed a plug-in to track the statistics on the blog itself. The plugin is not so creatively, but certainly effectively named “WordPress.com Stats”. Again, installed and activated…oops…need to sign up for a WordPress login in order to get an API code (whatever that is!)…got the code, entered the code…and where did the stats go? Hmmm…this one isn’t for the ‘public’, but for the Administrator, so it stays on the ‘behind the scenes side of the world’. This one is found in the Plugins area of the WordPress control panel:

WordPress.com Stats PlugIn

Now, when I click on that item in the navigation, I get a visual look at the activity on the blog. Very useful if you’re trying to quantify the success you are having with your blog.

After each PlugIn was installed, I checked how it performed from the ‘front side’. Tweaks and adjustments to get it ‘just so’ were required, but the basic functionality simply ‘was’. It just ‘appeared’ because I had activated and configured the plugin.

So, three steps to most plug-ins: Install, Activate, Configure. Only the configuration step really varies from plugin to plugin.

Next time, we’ll talk about the categories, tags and the big ‘launch’.

How on earth did you create your blog? Part 1

Since launching this blog a couple of weeks ago, I’ve had oodles of questions from people who want to know how I went about launching this blog, what they should do to start one, how hard the process was, etc. I’ll give a little background here, then expand on some of the areas in future posts (honestly, you don’t want to read it all at once).

Let me start by saying that I did NOT want to blog any more than I wanted to join LinkedIn (of which I am now an advocate) or Facebook (which I like for being able to connect with long lost friends, but not professionally because I have a B2B [I know, I know…businesses can use it, too]) or Twitter (whose point I don’t totally get yet – sorry – even though I have an account). I had to be shown why a blog would be beneficial to me. In other words, why a blog wouldn’t be more trouble than it was worth.

Ultimately, I started this blog because people often ask me ‘how do I’ or ‘how can I’ questions about technology. People are always looking for easier ways to do things on their computers, or they’re trying to figure out how someone else did something. It shouldn’t be a secret. These should all be ideas/thoughts that we can share. I run across ideas all the time – asking other people how they do something, or reading about interesting tools available out there. Face it, it’s impossible to know everything that’s out there for these suckers! Just like there are thousands of apps for my Android phone, there are literally thousand, perhaps hundreds of thousands or millions of different tools available to help your computing life go easier (or make it more complicated, for that matter – I want to focus on the ‘easier’).

When I decided that the best way to help people, and answer the world of questions that I get, would be on a blog, I set out to find a SIMPLE, INEXPENSIVE way to publish my newly conceived blog. Enter WordPress. That’s what we use here…WordPress.

Why?

1. WordPress is free (yup, FREE). Its free because developers from around the globe have worked to program it…all for free, so we get to use it free. It’s ‘open-source software’ (you might have heard that term elsewhere – it means that anyone who wants to can contribute to the development of the product can do so). People are always working to add to it or improve it.

2. WordPress can be run as a part of your website (that’s what we’re doing here) or on the WordPress website (you have limited control of the setup if your WordPress installation is a part of THEIR site). You just choose before you install. If you have a website that you can access and control, then install your blog as a subset of your own website. If you don’t have control of your website, then it probably makes sense to allow WordPress to host the blog portion of your site.

3. WordPress installs (literally) in under 10 minutes. They say they’re ‘famous’ for it. They were right.

UPDATE 9/8/15 – Someone who read this series of posts on blogging (there are two more after this one) took the time to email me with a link to an infographic that he had created which compares WordPress.org (host WordPress on your site) against WordPress.com (blog hosted by WordPress itself). Check it out – it gives a great visual:

Mike Wallagher’s WordPress.com versus WordPress.org infographic

Thank you, Mike!

(end 9/8/15 update)

4. I have a friend who has a WordPress blog, so I could ask questions. Don’t underestimate this aspect…it always helps to have someone you can call and say ‘hey…do you know how…’

5. You don’t need to be a programmer (remember, I’m not a programmer – I know just enough at times to be dangerous – ask the developers that I work with!)

6. Once installed, you can pick a theme to make the site suit your personality (the one we use here is a theme called ‘7color’ – we think it goes well with the look and feel of the main part of the website)

7. You can post articles immediately upon installation.

If you host your own blog (i.e. download and install it on your own site), you can then customize your blog with tools called ‘plug-ins’.

What’s a plug-in? Plug-ins allow you to customize and add features to a program. For those of you who use Firefox as a browser (among other programs), there are all kinds of plug-ins that allow you to alter the basic Firefox program. The WordPress plug-ins work the same way. Only features that you want to use are installed. You’re not stuck with a lot of features that you don’t understand or want. We’ll discuss the plug-ins that’s we’re using on this blog at a later date (it’s only a few so far – ya gotta give me time, gang!).

A friend of mine who put up a WordPress blog recently summarized it well – the base WordPress site installs easily, but finding/adding plug-ins isn’t necessarily intuitive. The documentation isn’t strong, but the discussion groups are. Remember, thousands of people are working to improve WordPress for no compensation. Therefore, the documentation isn’t phenomenal, but there are fabulous groups of people who are more than willing to help with just about any problem.

So, to summarize Part 1 of our “How did you create your blog”:

First, decide that you have something to share that others might want to read (or watch or listen to).

Second, decide whether you are going to host the blog on your website, or if you want WordPress (or another blog provider) to handle it all (that determines the ‘next steps’). A good comparison of what WordPress allows/does not allow you to do based upon whether you host or WordPress hosts can be found here: http://en.support.wordpress.com/com-vs-org/

Note: WordPress isn’t the only blogging software out there. It’s just the one that we chose. Blogger (found at www.blogger.com is another free blogging software (though I haven’t used it, so I can’t comment on it). Blogger is owned, I believe, by Google, so it’s probably as user friendly as other Google tools. Aweber (www.aweber.com) is a PAID tool ($19/month as of this writing), but allows you total flexibility. I’m sure that there are (literally) hundreds of choices. I chose WordPress because I knew about it, it was free, and I knew people who were using it. Not a scientific decision.

Third, just install it! As NIKE says, “Just do it”. It will NOT create itself. You don’t have to tell anyone you’ve started. Try it out, see how it feels, see if you can find your ‘voice’.

We’ll continue later with more aspects of the ‘how did you create it’, but hopefully, this gives you a good feel that getting started wasn’t hard…the procrastination took wayyyyyy longer than the doing!