Whether you’re trying to create documentation in a ‘how to’ manual, or send a screenshot to your boss, or trying to explain to Tech Support what’s going on with your computer, being able to do isolated screen captures is a marvelous capability to have.
First, you should know that to capture your entire screen, you only have to press the ‘PrtSc’ or ‘PrtScn’ button on your computer keyboard (usually found above the numbers keys or the F-keys). Then, open up any word processing document and click
But sometimes, you only want an isolated part of your screen. What do you do then?
If you’ve read this blog in the past, you’ll see images embedded – many of them bits and pieces of my computer screen, rather than the entire screen.
For instance, if I want to show you a piece of the window I’m editing this post in, I might show something like this:

So, how the heck do I do this? There are two tools that I use – one is FREE and one costs about $50. Why not just use the free tool? Well, because the tool that you pay for has some more features that I find useful, but I started with the free tool.
As you all know, I like a free tool wherever possible…if I need to upgrade, I do so when I’m actually capable of using the additional features.
So, the two tools are:
Easy-Capture (FREEWARE)
Snag-It (30-day free trial, $49.95)
Not only do these tools allow you to capture screenshots from your computer, they also allow you to do simple image editing – which for me, is all the image editing that I’m capable of doing. I want to crop, adjust the size, adjust the color, etc. Mind you, these tools aren’t PhotoShop, but if you only need to work on an image occasionally, and just need to make simple changes, then these tools may work for you.
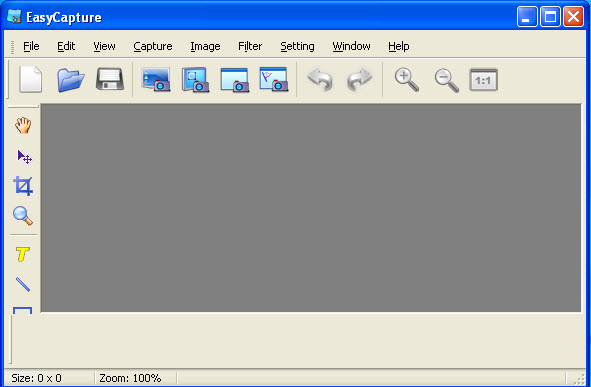
How do they work? What do they look like? I’ll use the Easy-Capture as an example:
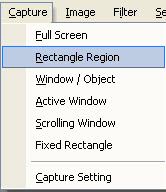
You simply select the type of capture you want to do from the ‘Capture’ menu:
Once you’ve picked the type of area you want to capture, you’ll be given further instructions (in this case, I said that I wanted to capture a ‘rectangle region’, and it gives me this image:
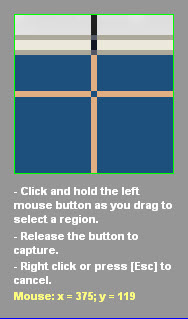
The instructions tell me to ‘lasso’ the area that I want. It took me a couple of tries the first time, but once I got the hang of it, it was very easy. When I release the mouse, the image that I ‘caught’ appears in the capture window:
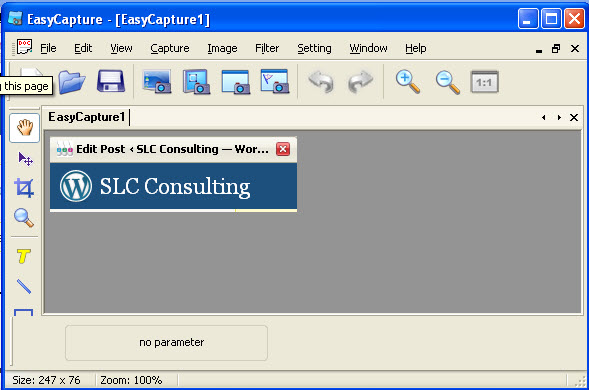
From here, I can use the toolbar at the top, or the icons on the sides to manipulate the image and save it. I can save the image in a variety of formats (the typical jpg, gif, bmp, etc.). Once it’s saved on my computer, I can place it anywhere I want.
Both these tools download and install quickly without alot of computer ‘overhead’ (i.e. they’re don’t hog all of the computer resources). I use them ALL THE TIME, yet I don’t even use all the functionality that they have available. Like most things in life, I use what I get comfortable with. Tools like Photoshop by Adobe, while incredibly flexible actually have TOO MANY features for me. Additionally, I don’t need an expensive tool to do something this basic.
I find that Easy-Capture or Snag-It have all of the image capturing and photo editing capabilities that I need.